Way back when I first started shooting with my macro lens and Nanlite Pavotubes, I took a lot of photos using the best studio-like setup I had available: the top of our washing machine. It was a smooth, reflective, white surface that really helped highlight the subjects I was photographing while also giving me lots of opportunities to play with colored lighting. It quickly grew tiresome though, partly because the area was kind of cramped and also because…well, it’s a washing machine. I mean, it’s not exactly meant for taking photographs.
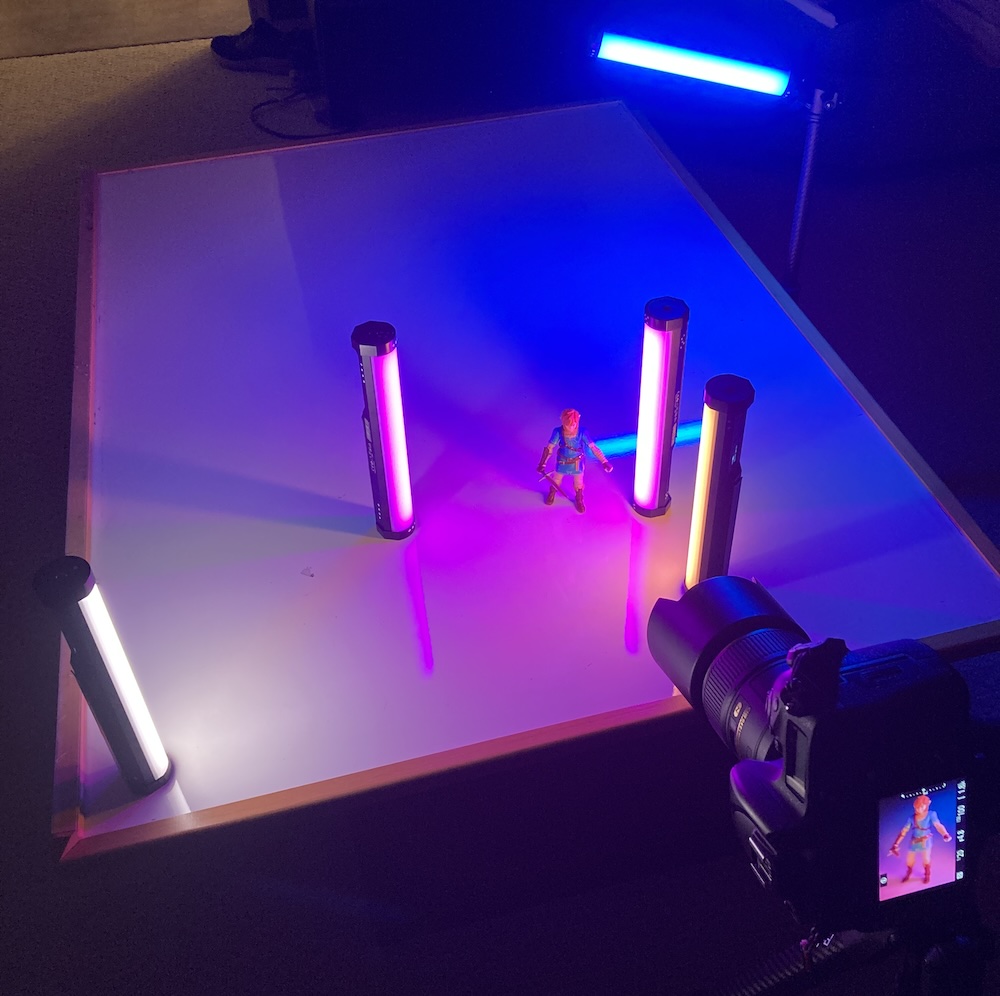
I have been thinking about other ways to replicate the general idea of the homemade washing machine studio but in a more practical fashion, and realized I could basically accomplish the same thing with a whiteboard we’ve had sitting in the living room that our friends gave us way back in the early days of the Covid-19 pandemic. (Has it really been four years? My goodness.) My kids and I designed this composition one evening after the sun had gone down, and after a few minutes of tinkering we got the setup you see here:

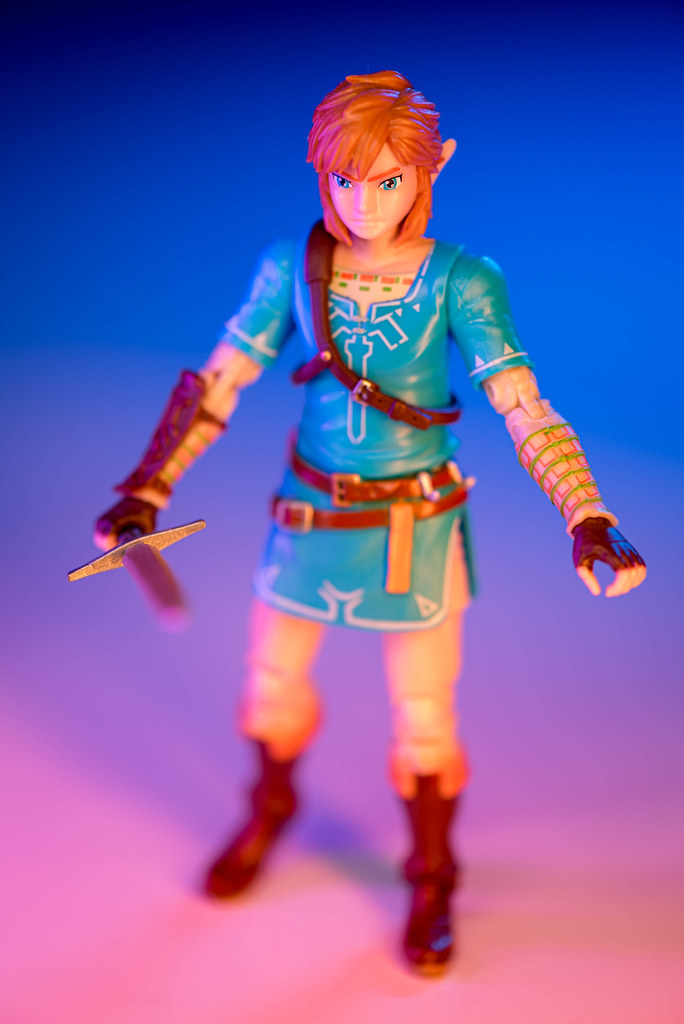
I wanted to capture the sense of Link (Breath of the Wild Link, that is) as if he were going into battle, about to face an overwhelming enemy or go into the deepest depths of a dungeon or shrine, and intentionally used a few things to make that happen. First, I had to consider how to place Link and what angle to shoot him from. I chose this pose because his body language, particularly his right hand holding the sword, was brave, courageous, and defiant–practically daring his foes to challenge him. I shot from slightly above partly to create a small sense of helplessness but also because of the more practical reason of needing to make sure the shot captured only the whiteboard, not our kitchen and living room which would have certainly been in frame had I used a lower angle. I focused on Link’s left eye and shot in manual to get full control over every element of exposure.
All pretty standard stuff, really.
What was really fun, though, was the lighting. I started with two Pavotubes and ended up with five, all different colors and all purpose placed to create the end result you see above. I used a blue light behind and above, paired with orange and red lights on the side, to create the gradient that makes it feel like Link is walking into a devious fire trap, most likely set by his arch-nemesis Ganon. I used one light on the left set to normal white but with a color temperature somewhere around 3000K to bring out a bit of Link’s natural colors, which can tend to get a little wonky if you shoot a scene like this using only colored lighting. The end result is a really fun photo not unlike this shyguy but with perhaps a bit more thought and care in terms of lighting.
Jill McKechnie says
What a cool and fun photo! I love the idea of the whiteboard and pavotubes. I assume you can get the pavotubes on Amazon?
Thank you for always including detail as to how you set up your shot, what equipment, etc., as that’s very helpful for us amateur photographers
Simon says
Thanks for asking about the Pavotubes, Jill. I think you can get them on Amazon but I got all of mine at BH Photo Video. Watch out though, if you get one you’ll want to start getting more…