• Skip to main content

Weekly Fifty

Exploring the wonders of creation through a 50mm lens...and other lenses too.

  • Subscribe
  • YouTube
  • About

Triplets

July 22, 2015 10 Comments

Tripletshttps://www.weeklyfifty.com/wp-content/uploads/2015/07/WeeklyFiftyPodcast2015July22Triplets.mp3

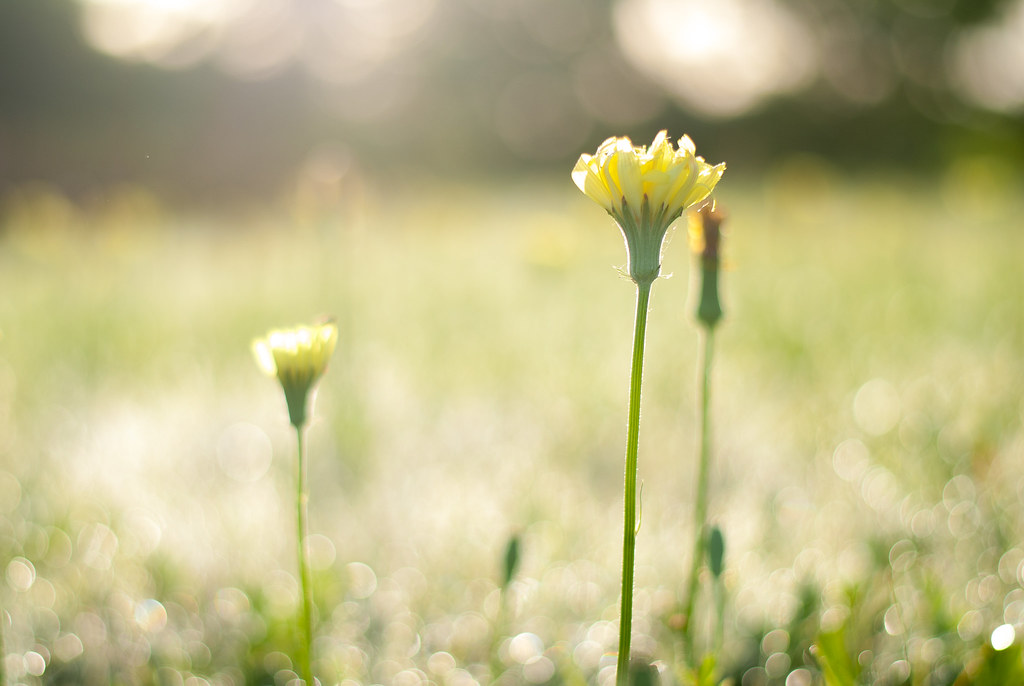
To be honest I feel kind of silly posting this picture because there’s not really a whole lot going on here: it’s a couple flowers against a green background. Anyone could get this shot, maybe even with an iPhone. So why post it here? Well…because I just like the photo. It didn’t require any special techniques, gear, or even much effort but that’s not really the point. If my goal as a photographer (well, one of them anyway) is to create images that I like, then this basic picture fits the bill quite well. I shot it when I was out looking for a different photo that I might post here someday if I can ever get it right, and even though there’s nothing particularly noteworthy about it I think I might end up printing it as a wall decoration someday. It’s simple but visually pleasing, and sometimes that’s all you need :)

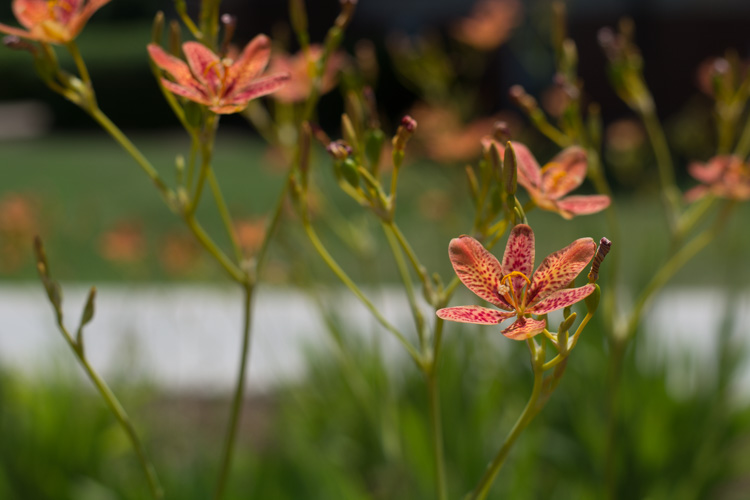
This was in the middle of a medium-sized flower patch and that I paused and examined for a few minutes from a couple different angles. I generally don’t like shooting at ultra-wide apertures because the shallow depth of field can be a bit too unwieldy, so I took a few at f/4 with the goal of getting one flower in focus but adding some blurred out ones in the background for a bit of context:

DSC_7843
A similar photo shot at f/4. Big difference between this and f/1.8 :)

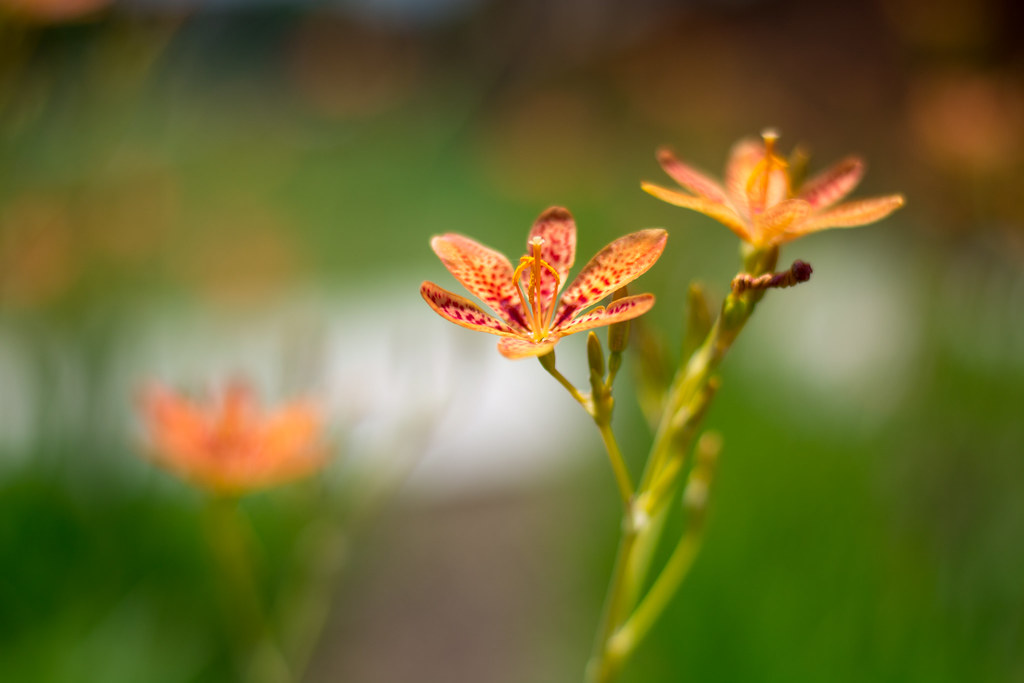
I usually don’t look at my pictures until I get them loaded into Lightroom but I wondered if f/4 might result in a depth of field that was a bit too wide, so I looked around a bit more for a solitary flower with just a few others in the background. Soon I found the one you see in the original photo and took a few shots at f/1.8 (which required a 1/8000 shutter speed even at ISO 100) specifically because I was hoping to do a couple of things in the image:

• I wanted the focal point of the image to be the flower in the center, which was a bit different from my usual style of having the subject off to one side
• I wanted the flower on the right to be slightly out of focus, but not too much
• I wanted the third flower on the left to be way out of focus to give a sense of depth and perspective
• I wanted the sidewalk behind the flowers to be in the background as a way of adding a bit of color variety

Overall I am quite pleased with how things turned out, and I guess it just goes to show that sometimes you don’t need to be all artsy and technical about things. Sometimes you just gotta take a picture of a flower :)

Read my educational photography articles at Digital Photography School

Precious Cargo

July 15, 2015 16 Comments

Precious Cargohttps://www.weeklyfifty.com/wp-content/uploads/2015/07/WeeklyFiftyPodcast2015July15PreciousCargo.mp3

This was a photo I’ve had in mind for a long time, but for some reason kept putting off until one morning this summer when I finally decided to go for it. It involves something called a Bokeh Wall, which is basically a homemade solution for creating cool sparkly out-of-focus backgrounds like what you see here. All you need (so I’d heard) is a vertical surface and something you can attach to it that reflects light. Even though everything I had seen seemed to indicate that homemade bokeh walls like this were quick and inexpensive I always figured it would involve a lot more planning and preparation than it actually did. I’m going to be honest here: the picture you see above took exactly ten minutes to capture, involved almost no pre-planning, and was an entirely spur-of-the-moment activity that my son and I did before I left for work one rainy morning a few weeks ago.

Here’s a picture of our entire setup that I took with my iPhone:

IMG_2066

If it looks all too simple, trust me: it was. In the foreground is my D200 with my trusty 50mm lens. Next is a toy train I pulled out of one of my kids’ toyboxes and behind that is, I kid you not, one sheet of crumpled aluminum foil taped to a board we got at the local Habit ReStore for two dollars. I thought I would need a tripod, but tried a few shots with my camera sitting on the table and it worked just fine. If you’re looking at this picture right now and thinking “This is cool, but I’ll never be able to get a shot like that,” trust me: you can :)

I shot this at f/1.8 to get some really cool bokeh going on in the background, but as usual I kind of wish I had stopped my lens down a bit because the depth of field is just a bit too shallow for my liking. And while I could go back and re-do the photo (and probably will), I wanted to post my initial shot here even though it’s less than ideal because I was so excited about taking it. The dual-toned background is a result of two light sources: a window which is just to the left of my camera, and an overhead chandelier. Light coming in from the window is more white whereas the incandescent bulbs on the chandelier were yellow, which not only led to the multicolored background but helped light the toy train in a bit more interesting manner as well. Incidentally I also used the self-timer on my camera to eliminate any possible vibration from my finger pressing the shutter, and also shot at ISO 100 to get the highest-quality noise-free image possible, and given that my camera and my subject were stationary the resulting low shutter speed of 1/20 was not really an issue.

This makes two pictures here on Weekly Fifty that were the result of sheer curiosity, experimentation, and good old-fashioned trial-and-error. And if you take anything away from this post, I hope it’s at least a small desire to try something new with your camera too :)

Read my educational photography articles at Digital Photography School

Firestarter

July 8, 2015 12 Comments

Firestarterhttps://www.weeklyfifty.com/wp-content/uploads/2015/07/WeeklyFiftyPodcast2015July8Firestarter.mp3

This is a shot I have had in mind for a long time, and was able to finally get it thanks to some help from my brothers Phil and Tom on our recent family vacation. It’s a particular style known as Steel Wool Photography and ever since I saw a few examples several months ago I have wanted to give it a try. When we headed up to our annual trip to Milford Lake in central Kansas we went to the beach and spent about a half hour playing around with different compositions until we found a few that we liked. The basic idea here is pretty simple, but takes a bit of planning to pull off along with the following sundry items:

Kitchen whisk from the dollar store
Two feet of chain
Connector to hook chain to whisk
00-grade Steel Wool from any hardware store
Cigarette lighter

All the above items can be bought for less than $10, and after that you just need a dark night and some open space to play around. The spark trails come from the steel wool itself: light it on fire and it will start to glow, and then spin the contraption around to create sparks that fly out in all directions. We took several initial shots that ended up looking like glowing circles or giant spark-flinging springs hovering on the beach (you can look at a few examples on my Flickr page), but eventually we came up with the idea of having Tom stand in one place and spinning the whisk around above his head.

To get this particular shot I had Tom stand about 30 feet away and hold very still while swinging the smoldering steel wool above his head. I set my D7100 + 50mm lens combination on a tripod and used an exposure of 30 seconds at f/13, ISO 200. This was the fifth or sixth photo we took during our experimentation session, and I was quite pleased with how it turned out. You’ll notice a strange glowing effect on Tom’s face if you look closely, which came about by way of me running up to Tom after I clicked the 30-second shutter and shining a dim flashlight on various parts of his body. The small glow in the center of his chest was from when he initially lit the steel wool with the lighter, which kind of looks like some kind of video game effect. My idea was to make it appear as though Tom was standing perfectly still along with a spiral of sparks and flames above him, but the finished picture looks a bit off because, let’s face it, it’s hard to stand perfectly still for 30 seconds while twirling a red-hot spark-throwing kitchen utensil a foot from your face. Part of me thinks this is what a Final Fantasy summon spell would look like in real life too :)

I was really excited to get the opportunity to try a few shots like this, and look forward to doing it again and refining what I learned on this initial trial run. Many thanks to Tom for doing the gruntwork and and Phil who helped coordinate everything while also taking some cool shots with his D3200 + 35mm lens. Also thanks to Prodigy for giving me the idea for this picture’s title.

Read my educational photography articles at Digital Photography School

Flower Sunrise

July 1, 2015 15 Comments

Flower Sunrisehttps://www.weeklyfifty.com/wp-content/uploads/2015/07/WeeklyFiftyPodcast2015Jly1FlowerSunrise.mp3

Another one in the never-ending series of pictures that fall under the category of “Shots I almost didn’t get because I was too lazy,” this is kind of a simple picture of a flower at sunrise but there’s a few things that stand out to me not only about the photo but about how it was shot, so I figured it was fairly well suited to end up here on the blog. We have had an unusual amount of rain in Oklahoma this year, with May being the wettest month ever since records have been kept. So much precipitation, in fact, that sunny mornings like this have been more the exception than the rule. This has led to an incredible amount of greenery and other natural growth that doesn’t usually happen until a bit later in the year, if at all, and is part of what made this shot possible in the first place.

As I was driving to work (instead of biking, thanks to the wet weather) I saw this field near our house that had exploded in yellow flowers overnight. My first thought was “Hmm, that would make a good picture” and then I just kept driving. Seriously, I almost didn’t get this picture because I decided I couldn’t spare 30 seconds to stop my car and walk across the street. Thankfully I quickly realized that this was a pretty lame course of action especially given how often I preach about getting your camera off the shelf and going out to shoot with it. A half block later I pulled into a parking lot, grabbed my camera, and ran back to the field to take a few pictures because…well, why not?

I liked how the sun was peeking over the horizon which not only gave a nice bit of backlighting on the flowers, but also gave the rain and dew on the ground an ethereal, almost otherworldly look. (Truth be told it reminds me of some areas deep within the planet Zebes.) I purposely left the image a bit low in overall contrast to give it a somewhat dreamy quality, as if you were looking at it soon after waking up before your vision has cleared. As is my custom I did not review the shots on-site, and instead just got in my car and continued on my drive to work hoping I got a good picture. Turns out I did, or at least I got one that I’m happy with. And really, that’s often all that matters with photography anyway :)

Read my educational photography articles at Digital Photography School

Fountain Stroll

June 24, 2015 7 Comments

Fountain Strollhttps://www.weeklyfifty.com/wp-content/uploads/2015/06/WeeklyFiftyPodcast2015June24FountainStroll.mp3

I’ve said before on this blog that I’m not a big fan of excessive photoshop manipulation, but this image is certainly a notable exception. First, a bit of background: this fountain sits just in front of the main library on campus, and for a while now I’ve wanted to get a shot just like the one you see here with the water streaming while a passer-by strolled behind it. Shooting this with a 50mm lens presents some problems, the first of which is light or, rather, the overabundance of it. Without a neutral density filter to block out some of the incoming light, shooting at a slow enough shutter speed to get motion blur requires a super low ISO and super small aperture. On a bright sunny day an aperture of f/16 (the smallest aperture my 50mm lens will shoot at) and ISO 100 requires a relatively fast shutter of 1/30 or 1/60 which is far too quick to get the motion blur I was looking for. Another problem is that of proximity: a shot like this requires the photographer to be somewhat close to the fountain since prime lenses don’t zoom. And finally there was the human element, which was quite out of my control since I had to wait for someone to casually stroll by.

On a recent rainy day all these elements came together: the light was dim so I could shoot at a slower shutter speed, I was able to stand on an edge of the pool at the base of the fountain to get close, and there were enough people strolling around for me to get a shot of one of them walking past. This left another problem though: I shot this handheld at 1/8 second, which meant it was very difficult to get a clear picture without any background motion blur. The only blurry elements I was wanting were the person and the fountain, and at 1/8 second even the smallest movement of my camera would result in a noticeable blur in the brick background. My solution to this was to shoot in continuous high-speed mode which is about 5fps on my D200, hoping that I’d at least get one shot that was clear. Turns out I did, but it wasn’t the shot I was hoping for. This, then, led to a bit of photoshop trickery. For reference, here’s the original picture as it was shot:

stroll-clear

Everything is nice and clear, but there’s one big problem: the pedestrian is way too far to the left. Thankfully I did get this shot a fraction of a second earlier:

stroll-original

Bingo! The guy is precisely where I wanted, but the photo is all blurry thanks to my shaking camera. I used Photoshop to cut and paste the walker from this image into the first one, but then I also had to remove him from the left-hand side of the original as well. As luck would have it, there was a third (mostly) clear picture I could use for filling in the left-hand side:

stroll-clear-left

The final image, then, is a composite of all three and since I was already doing plenty of Photoshop alterations I went all in and removed the signs and icons from the library doors. I figured if I had already committed to altering my picture, I would go ahead and make Lando Calrissian’s worth nightmares come true and alter it even further.

This raises some serious questions that every photographer must grapple with, and have been trying to answer for decades even before Ansel Adams was dodging and burning landscapes in his darkroom: how much image manipulation is too much? When does a picture cease to represent reality and become merely an interpretation of reality? What responsibility does a photographer have when presenting his or her images to the world? What about the use of filters or color alterations such as Sepia or Black and White? There are no good answers of course, and every photographer is going to have a different stance on the matter. But if I could leave you with one piece of advice it would be this: be able to justify whatever editing decisions you make, whether to yourself or to someone else. Make your edits intentionally and for a purpose, and if nothing else you will sleep a bit easier at night knowing you at least had a reason for what you did :)

Read my educational photography articles at Digital Photography School

  • « Go to Previous Page
  • Page 1
  • Interim pages omitted …
  • Page 111
  • Page 112
  • Page 113
  • Page 114
  • Page 115
  • Interim pages omitted …
  • Page 138
  • Go to Next Page »

Copyright © 2026 Creative Commons License
This work is licensed under a Creative Commons Attribution-NonCommercial-NoDerivs 3.0 Unported License.