• Skip to main content

Weekly Fifty

Exploring the wonders of creation through a 50mm lens...and other lenses too.

  • Subscribe
  • YouTube
  • About

Mustang

March 9, 2016 16 Comments

Mustanghttps://www.weeklyfifty.com/wp-content/uploads/2016/03/WeeklyFifty2016March9Mustang.mp3

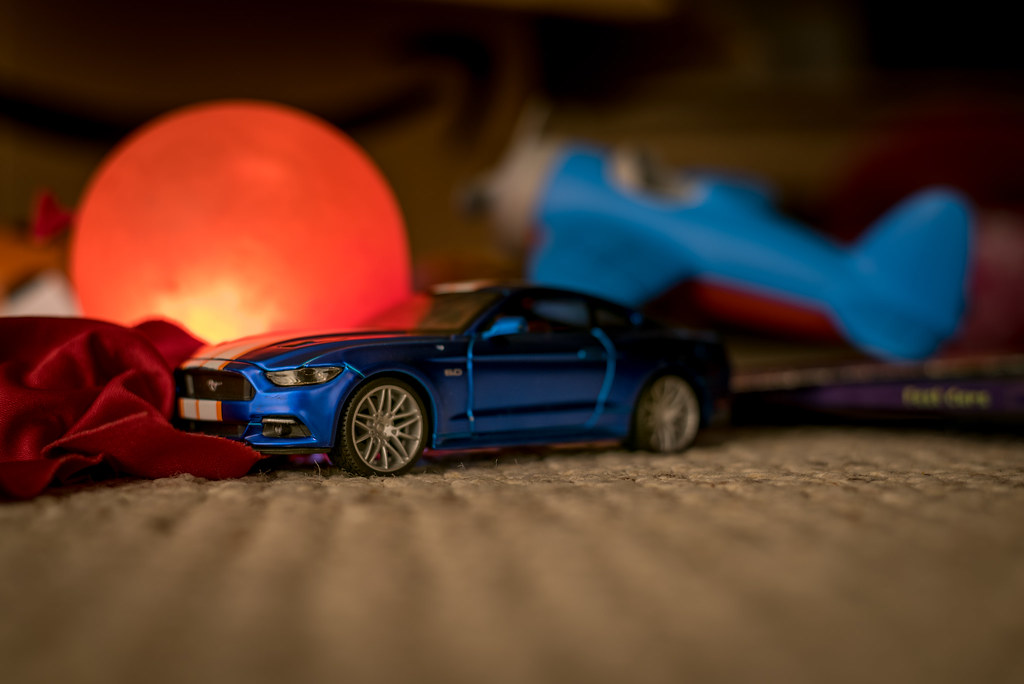
The story of this picture, which is just a few of my kids’ toys on the living room floor in the wee hours of the morning, begins with this talk by National Geographic photographer Sam Abell. In it he discusses, among other things, the process through which he created one of his most famous pictures, Pears in Window, Moscow. His presentation is kind of long but well worth your time if you have an interest in learning more about photographic composition, and one thing he discusses is composing your pictures in such a way that all the elements (foreground, subject, and background) all come together to form a cohesive whole. Now, this picture of a toy car is so far from one of Sam Abell’s masterpieces that the two hardly seem worth mentioning in the same blog post, much less the same paragraph. Nevertheless I did use a bit of what I learned from Mr. Abell when I made this image so I thought I’d share it here.

I took this picture on a Tuesday morning before my kids were up and I just wanted to use my camera. I got out my D750 + 50mm combination and went around the house taking pictures of anything I could find, like a bottle of olive oil, some cups on the table, or a paintbrush that had been cleaned the previous evening. I didn’t think about whether something would make for a good picture, but instead just focused on using my camera to make some images and if I didn’t like them I’d just delete them. After a little while I came across this blue car on the floor surrounded by a balloon, airplane, and other sundry items which made me stop and think a bit about what I learned from Sam Abell.
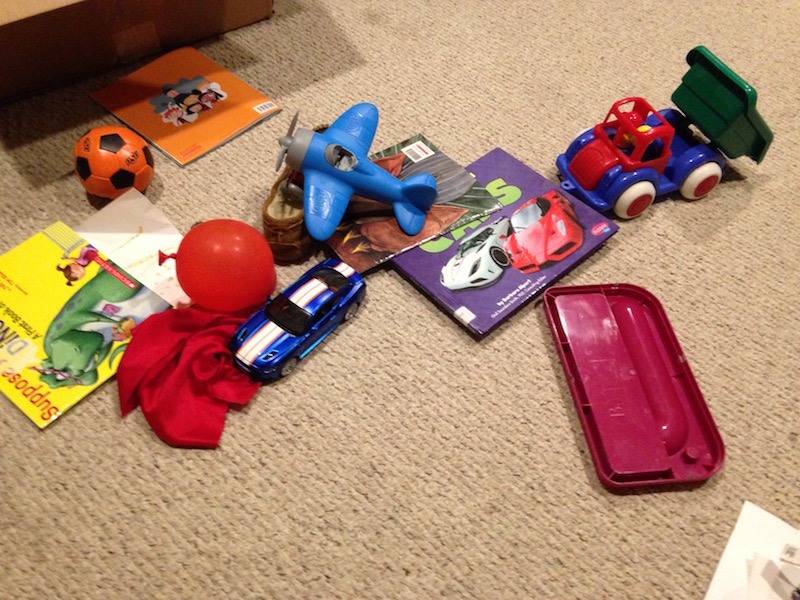
Same scene as above, but with the lights on.

When he took the picture of pears sitting on a window ledge, he spent 12 hours trying to get just the precise shot he wanted. He looked at all the elements of the scene: the pears, the curtain, the buildings, the sunlight, the clouds…everything. He watched and waited and took several pictures throughout the day and it was only when all the elements came together that he finally got the picture which went on to become one of the most famous in the history of National Geographic. My picture of a few toys won’t go anywhere and will be entirely forgotten by me and the rest of the world in a few days (and that’s fine with me!) but nevertheless I tried to put into practice a few things that I learned from this master photographer. I moved the airplane just slightly to the left and propped it up with a slipper; I put a tiny flashlight behind the red balloon; I stuffed the red cloth under the front of the car. I also used live view and set my camera on the floor to keep it steady so I could shoot with much longer exposures of 3 or 4 seconds at ISO 100, and I focused manually to get precisely the right part of the car in focus. (Using live view you can zoom in to check that things are focused how you want them and then take your shot, which can be really handy sometimes.)

The result is not a special picture in and of itself, but instead it was the process of taking the picture that meant something to me and is the reason I’m sharing it here. It represents another footstep on the never-ending path of learning photography, and I hope will help inform how I approach other pictures from here on out.
Read my educational photography articles at Digital Photography School

Two Weeks

March 2, 2016 14 Comments

Two Weekshttps://www.weeklyfifty.com/wp-content/uploads/2016/03/WeeklyFifty2016March2TwoWeeks.mp3

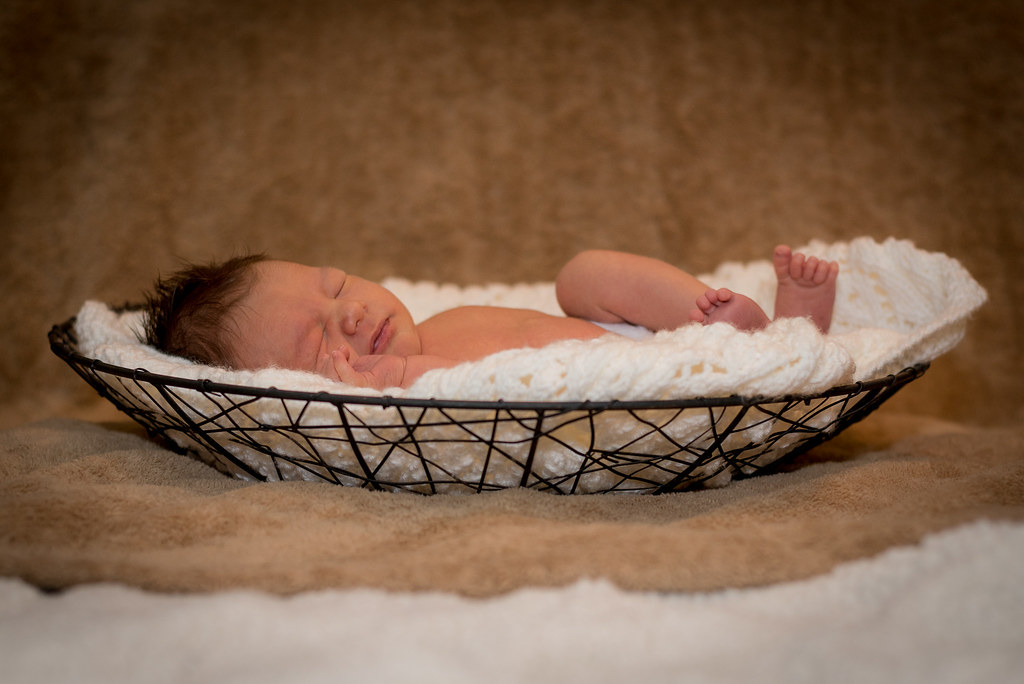
First things first: this is not my kid :) He is, however, the son of a friend of mine who was kind enough to let me come into her home and take a few pictures when he was only two weeks old. This type of photography has long intrigued me and I was so glad she was willing to let me come over and spend an hour taking pictures of her son and her five-year-old daughter. Several aspects of this photo session were somewhat unique, and even though things got a bit tricky at times I was overall quite pleased with how everything went. This post, then, is sort of a breakdown of the entire session along with a few lessons I learned along the way. Hope you like photo talk, because here we go…

When my friend had her baby, my wife and I immediately started planning for this photo session. (Actually, we had been thinking about it for a while but things really ramped up when we knew the pictures were imminent.) We looked online for examples of infant photography, investigated any equipment we might need to buy, watched videos from experienced photographers who take photos of babies, and even tried a few test shots in our living room using stuffed animals as placeholders. We went to Hobby Lobby and looked at several baskets and ended up choosing the one you see here, and sorted through all our blankets and fabrics to find a couple that would work for padding as well as aesthetics. I went to the session with the following gear:

Nikon D750 which I used for every photo because it’s awesome :)

Nikon D7100 (I brought this as a backup and did not end up using it)

50mm f/1.8 lens, which I used this for 80% of the shots

85mm f/1.8 lens, which I used for about 15% of the shots

35mm f/1.8 lens, which is a DX lens that works surprisingly well on my FX D750, albeit with some vignetting. I only used this on a couple shots and kept it at f/4 to reign in the dark corners.

Nikon SB700 speedlight which I used on almost every photo

5-in-one reflector that I didn’t use at all

Step ladder so I could take some photos from above

Blankets and lots of them. Some for backgrounds, some just to keep the baby comfy

Makeshift backdrop holder constructed from a piece of masonite board and some clamps from Lowe’s

Space heater to keep the baby warm. This was so useful it’s not even funny, and I’ll never do another infant session without it :)

The session took about an hour, not including some time to set things up and then tear them down at the end, and I think that was probably about the right amount of time to spend. I didn’t want to wear out the baby or his big sister, and the family had other things to do than spend hours upon hours taking directions from a photographer. I had taken hundreds, perhaps thousands, of photos of my own sons when they were infants but had never done a shoot quite like this for someone else so while some of this gear might have been a bit gratuitous I also wanted to make sure I was prepared for anything.

I started off with my D750 and 50mm lens which worked quite well, and since we were shooting indoors in the evening I had to use my flash to make sure everything was evenly lit. I almost bought a portable lighting kit for the shoot but I had to find a way of striking a balance between getting pictures and having a practical setup, and a big old softbox or some umbrellas for off-camera strobes just seemed like overkill especially since I was a guest in someone else’s house. One of my favorite tricks when using a speedlight is to bounce it off other surfaces to magnify the impact of the light, and for the picture you see at the top of this post I had the flash pointed straight up which essentially turned the ceiling of the room into one giant light bulb. It worked remarkably well for this as well as almost every other picture from the evening, and if you are interested in learning more about photography but don’t yet have a dedicated external flash I would recommend picking one up.

A few times during the evening I switched to the 85mm lens but found that it was a bit overkill and the depth of field was a little too shallow to properly manage without stopping my aperture way down. I wasn’t interested in compressing the background as much as I wanted clear shots of the baby, so mostly I just stuck with my old pal, the classic Nifty Fifty lens. I know it might sound a bit cheesy but the entire session really was a great deal of fun and I thoroughly enjoyed getting the chance to practice my baby photography skills, as this is an area that my wife and I would like to explore more for our side project Stevens Creek Photography.

To my friend…if you’re reading this, thank you for having me over and I can hardly believe how much your cute little guy has grown already. I hope you like the pictures as much as I liked taking them!

Read my educational photography articles at Digital Photography School

Sentinel

February 24, 2016 12 Comments

Sentinelhttps://www.weeklyfifty.com/wp-content/uploads/2016/02/WeeklyFifty2016February24Sentinel.mp3

(No, not that kind of sentinel.)

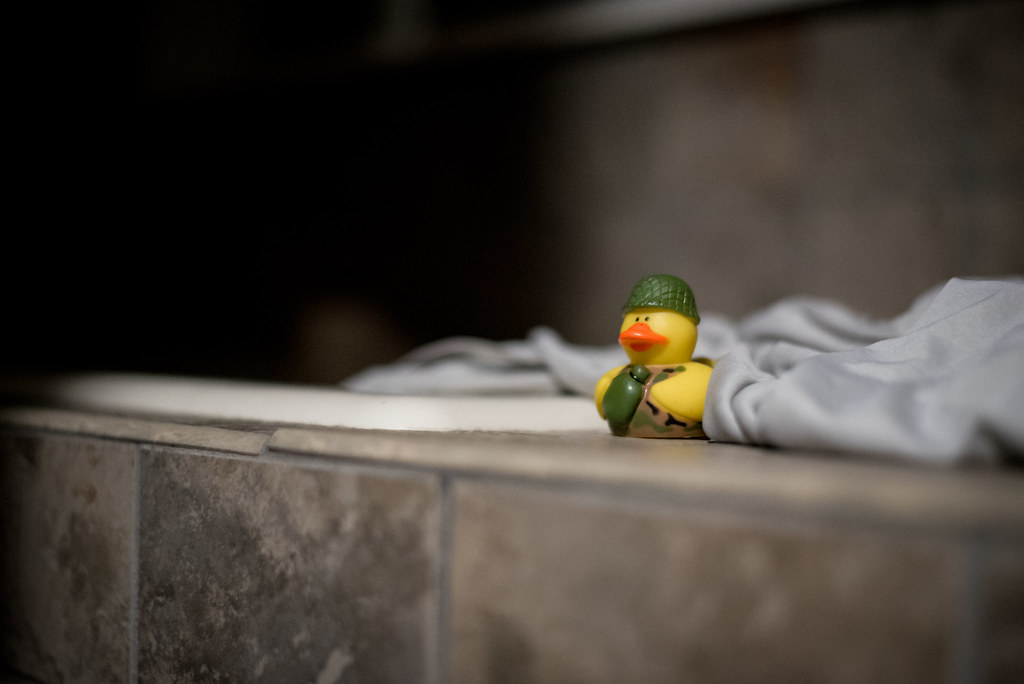
I’m not sure why I even thought to take this photo in the first place, and I’m not really sure what to think of it overall, but I do kind of like it. I was literally just brushing my teeth one chilly morning a few weeks ago when I happened to notice my son’s rubber ducky sitting on the edge of the bathtub. The sun was not yet up and the light you’re seeing is coming from the closet behind me, and I thought everything came together to form a kind of cool scene. I imagined this little yellow plastic waterfowl standing on the edge of a precipice keeping watch so as to alert the rest of his unit of any incoming enemy forces. Despite what was clearly a long, dark, and cold night this fella stood at his post and remained vigilant through the small hours of the night and would remain until the sun rose high in the morning sky. No ill would befall his friends tonight. Not on his watch.

I shot this with my D750 because the light was so dim that I knew I would need a higher ISO, and a relatively clean one at that. Also, I just like using any opportunity to take pictures that camera :) I don’t know if there is enough context to give you a sense that this duck is sitting on the edge of a bathtub, and I hope you don’t mind a picture with my pajamas all wrinkled up in the foreground, but if nothing else this photo brings a bit of a smile to my face. It’s probably a bit conceited to say this is a good picture but I do think it works to illustrate how you can find compelling photo opportunities in everyday life even when things seem kind of dull and boring. Of course it never hurts to get some interesting lighting conditions such as the wee hours of the morning, late at night, or on a cloudy day. In fact, I would recommend this as a possible course of action if you are ever struggling to find ways of jumpstarting your own photography: get up a bit earlier or stay up a bit later and pay attention to how ordinary everyday objects give off a whole new impression with the different lighting conditions.

There’s also one final note about the picture I thought might be worth mentioning. I shot this at f/1.8, (ISO 6400, 1/90 second) which meant the depth of field was razor thin especially since I was using a full frame camera so close to my subject. I think that’s why the duck’s head is just a bit out of focus, and the next time I take a shot like this I’ll make sure to double check that everything is sharp before shutting things down and going on with my day. I’m kind of curious to return to this scene tomorrow and see if my kids have played with this duck, and imagine what other things he might have been doing in the meantime…

Read my educational photography articles at Digital Photography School

Mosaic

February 17, 2016 20 Comments

Mosaichttps://www.weeklyfifty.com/wp-content/uploads/2016/02/WeeklyFifty2016February17Mosaic.mp3

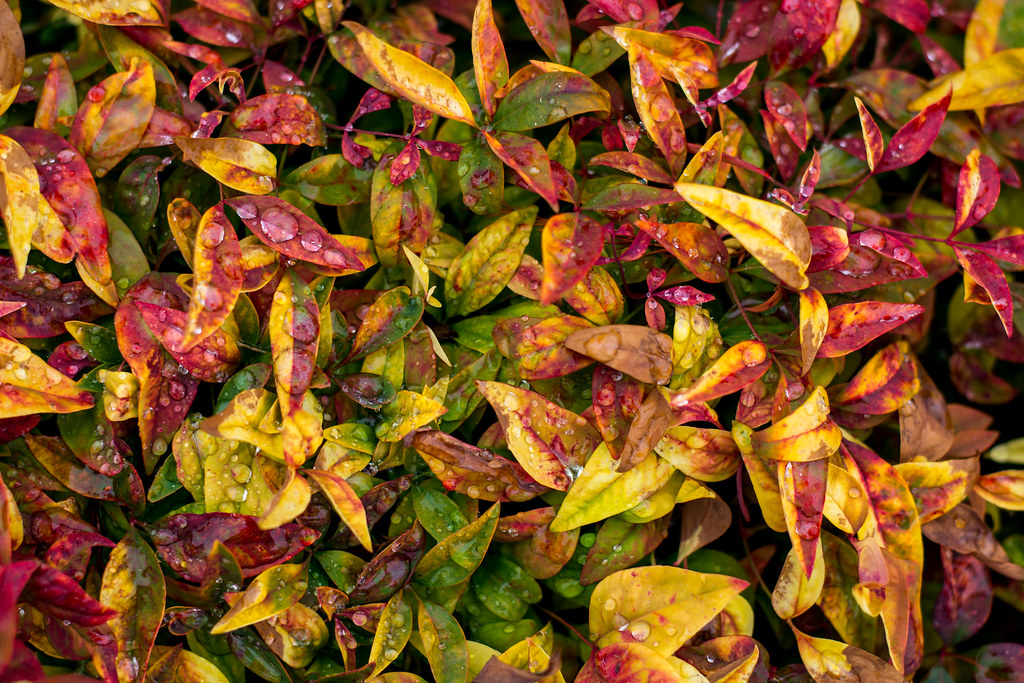
Do yourself a favor here: click on the picture to see it in the Flickr gallery, and then click the option to see it full-size. I’m not trying to be conceited or anything, but when I posted the image here on the blog it seemed like some of the sharpness and richness of color somehow got lost with the small size.

Did you do it? Cool :)

It was kind of a dreary day when I shot this image, and my coworker and I went out for a very short walk to just get out of the office for a few minutes. As I often do I had my camera with me (which is increasingly becoming my D7100 while my D200 sadly gathers dust on the shelf) just in case we came across a picture opportunity, and while I had no intention of taking pictures of these small bushes I did notice two things as we passed by that made me think twice: the mix of rich colors along with the bits of rain that had pooled among their leaves. First I took a couple shots from a low angle looking out over the bushes while trying to keep one large drop of water in focus, but they didn’t turn out all that great and looked rather derivative of some similar pictures I have taken in the past. Since I don’t look at the LCD screen on my camera that often I didn’t know how these initial images turned out, but as we kept walking I saw another cluster of colored leaves that was just begging to be photographed.

For the shot above I stood directly above this patch of leaves, set my aperture for f/2.8, and popped off a couple shots at 1/180 second with an ISO of 125. Even though the day was rather overcast there was plenty of light for shooting with a fast shutter and low ISO which turned out to be a huge benefit once I loaded this picture up in Lightroom. The original picture looks bland, boring, and altogether forgettable but thanks to the magic of shooting in RAW I was able to take the picture to (cliché warning) a whole new level.

Original un-retouched RAW file

This image is OK, but it’s lacking the texture and crispness of the edited file, and I also like how in the final version there is something in the way of a clear focal point as well. The larger drops in the top-left quadrant serve to anchor the picture and draw your attention, but in the original file there isn’t a good sense of what you are supposed to look at. I know some people who shoot in RAW but don’t do anything to the files in post, and while I’m not one to tell anyone how he or she should approach his or her own photography, I will say that if you are not doing anything to your RAW files you might as well shoot in JPG and let your camera take care of interpreting the data how it wants to. Neither one is necessarily good or bad and both have tradeoffs, but it might be worth your time to play around with your RAW files a bit in Lightroom or Photoshop to get a little more out of them than you might initially realize.

Anyway, sorry for the somewhat technical tangent there. I hope you like the picture and if nothing else, I hope you find time in the coming few days to get your camera out and go take some pictures with it :)

Read my educational photography articles at Digital Photography School

Running Man

February 10, 2016 4 Comments

Running Manhttps://www.weeklyfifty.com/wp-content/uploads/2016/01/WeeklyFifty2016February10RunningMan.mp3

(Note: Last week I mentioned that the picture of the cow was taken when the camera crew from a local PBS station was setting up to record a short interview with me. Here’s the video in case you want to see it.)

Over Christmas we visited some family in Missouri and I had a metal debate before we left which mostly centered on the question of bringing my D750 + 50mm lens or my D7100 + 35mm lens. Both lenses have a similar field of view since the 35mm on a crop sensor camera shows roughly the same image as a 50mm lens on a full-frame camera (though other things like background compression, bokeh, etc. are different due to the absolute focal length of each lens being different) so there really wasn’t a big advantage to bringing my new D750…except I really wanted to use it :) I did wonder if it would be worth the risk since the chances that it might get stepped on or dropped while on a family car trip with two young kids were much greater than the chances of it getting damaged while sitting safely on a shelf at home, but then, cameras don’t take very good photos if they are sitting around un-used.

In the end I decided that life’s too short to worry about such things, and I didn’t spend $200 on a drops-and-spills warranty so my new camera could get pampered and under-utilized. We took the D750 + 50mm combo and the more I used it while visiting our relatives the more I was glad we made that decision. It worked like a charm and there were only a few times during which the field of view was a bit too limited, though there really wasn’t a good way to solve this given my current lens and camera selection anyway. The real benefit of having the D750 on our holiday was its ability to shoot at crazy high ISOs (well, high compared to my D7100 but maybe not when pitted against some of the new cameras out there) and still get usable pictures of grandma and grandpa playing with our boys.

The evening before we left to return home I saw this piece of wire artwork which my wife made years ago in elementary school sitting on a bookshelf and thought it would make for an interesting picture subject. Since it was the Christmas holiday there were some lights and decorations in the house that aren’t normally around, so I tried to find a location for this sculpture that would put these accents to good use. I found a table with a lamp that had some Christmas lights behind it, set the sculpture down, and fired off a few pictures. My initial shots were at f/1.8 which resulted in the figure’s head being in focus but not the arms and legs, so I stopped down a bit to f/2.8 which still allowed me to use a relatively fast shutter of 1/125 second in order to eliminate any blur due to camera shake. Only problem was the dim light which meant I had to use ISO 5000…but my goodness. The final image is so clear I don’t think I could ever tell at first glance that it was taken at such a high ISO. My D200, which you all know I enjoy using, looks terrible at its max ISO of 1600. So yeah, as much as I enjoy shooting with my older cameras I’m really starting to enjoy this D750 :)

Read my educational photography articles at Digital Photography School

  • « Go to Previous Page
  • Page 1
  • Interim pages omitted …
  • Page 113
  • Page 114
  • Page 115
  • Page 116
  • Page 117
  • Interim pages omitted …
  • Page 146
  • Go to Next Page »

Copyright © 2026 Creative Commons License
This work is licensed under a Creative Commons Attribution-NonCommercial-NoDerivs 3.0 Unported License.